
[ad_1]
Disclosure: this post may contain affiliate links, which means I may make a commission if you decide to make a purchase through one of my links, at no cost to you.
This post may contain affiliate links. This won’t change your price, but may share some commission. Read my full disclosure here.
Where’s the ideal place for a plant shelf? Near the natural light that houseplants need to thrive, right? So, I set off to turn my large office window into a place for all of my favorite houseplants. New video and tutorial below!

Note: originally, I planned on posting this before announcing the big house selling news, but some things don’t go according to plan! So I hope you’ll enjoy something a little out of order and let’s pretend I still live there for a moment ☺️. It will give you a glimpse in how fast our expectations changed when we realized we wanted to move!
As you guys might have seen from this earlier post, I had to move my office from an upstairs spare bedroom down into the dining room. Our little one needed a nursery and the guest room already had dual functionality as Kyle’s office (we both mostly work from home these days), so my office was the most obvious room to convert.

The dining room was rarely used, so it too was an obvious choice for where rooms could move. That also meant an opportunity to choose a new design scheme — which you know I would never say no to!
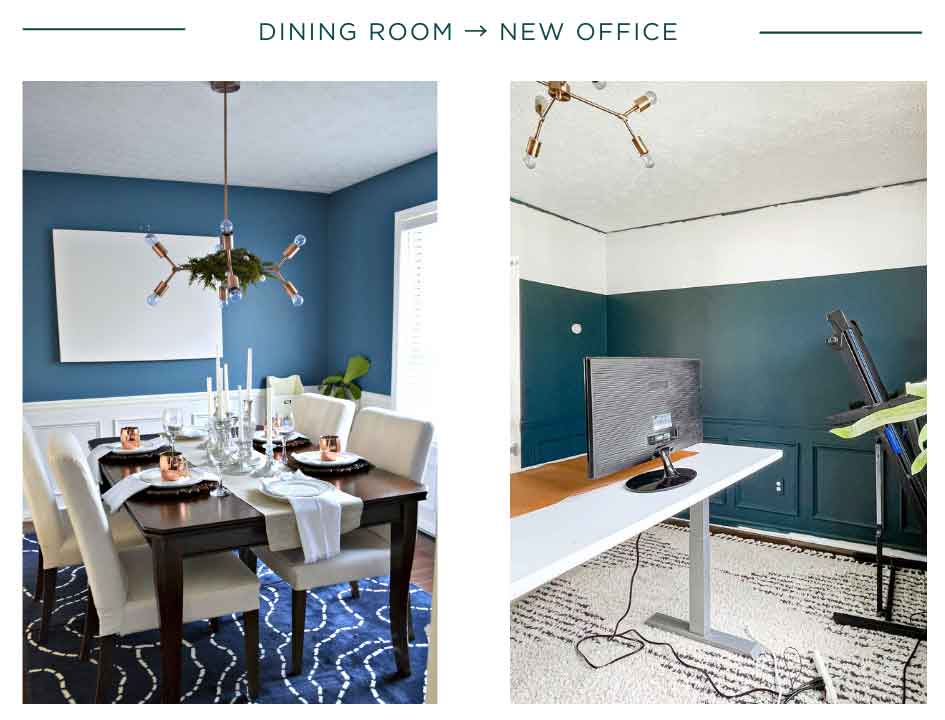
I started off by doing a color block treatment on the walls (see the how-to here), but another custom feature I wanted to add was a place for lots of houseplants. A lot of you guys on my social media (especially Instagram stories, where I share lots of sneak peeks) have been asking for these plans! The wait is finally over because I have them available for sale over on Spruc’d!

The best thing about the dining room was the huge window that faces the back yard, and I wanted to create a fun build that brought the outdoors in. My timeline for this project also happened to fall just before WorkbenchCon 2022, so it was a fantastic moment because I got to have a DIY bestie here to help me make it a reality: Anika from Anika’s DIY Life!

Anika and I took two days to paint the walls and build this wall-slash-window feature using plans that Kyle and I created. When the build itself was finished, I still had to finish painting the rest of the walls after the conference, so that’s why you might see some unfinished walls in the background of some of these photos. But, rest assured: walls painted, build completed, including adding crown! I like to give myself a hard time for never finishing anything, but this time I most definitely DID. This is a first of (I hope) many collaboration-style projects I’d like to do in the future, so I hope you like the video; there’s a shortened version below while the longer version is on YouTube. Anika shares some great tips about using a Kreg Jig while I have a few of my own tidbits to share as we completed this together. With any luck, I’ll be flying to California in 2023 to go help her with a DIY makeover of her own.
Check out the video below:
help me reach 25k!
DIY Window Plant Shelves

The full cut list is available on the paid plans, and keep in mind that this was a custom built project as well; this may not fit every window exactly and adjustments need to be made to widths and lengths to accommodate other window dimensions. You can purchase plans by tapping on the button below! For added convenience, I’ve also added a QR code to the plans with links to all the materials and tools I used. You can see a similar version of links in the shopping widget below (I’m trying it out because it has nifty features like a quick link to all of the items, plus you can add what you need straight to cart without leaving the blog).
Time needed: 2 days.
I’m putting two days in here because that’s how long it took us, but there’s no reason it wouldn’t take you less time! These plant shelves are designed to custom fit inside of the window frame, so you’ll need to modify my plans to fit your own window dimensions.
- Remove existing window trim
Because I started with plans, I had a little bit easier of a time cutting things to the exact measurements. I wanted to account for the new “trim” that would match the shelves and shelf supports, so I removed the top and sides of my existing window trim and used a multi-tool with a wood cutting blade to cut a small amount of the chair rail on each side of the window. I left the window sill in place because our plans were designed to build around it.

- Cut and assemble shelf supports
The shelf supports use 2 side pieces and 4 middle pieces each; these serve as the supports for the long shelves that lay on top. Anika attached pieces together using Kreg Jig pocket holes and clamps and strategically placed the holes where we ultimately wouldn’t see (since the shelf will lay over the top of the middle pieces, we put pocket holes on the top of each middle piece instead of under). I actually made a mistake on mine, where I cut the middle pieces too shallow for the combined depth of my window sills + shelf widths. As a result, I had to use L-brackets to provide additional stability to the middle support. I corrected the plans to reflect a deeper support construction so that the L-brackets wouldn’t be necessary, but just wanted to note that in case you think you see something different in the video than what the plans show (trial and error of doing this project for the first time and learning as we go!). By the way, Anika has a great course on learning to use the Kreg Jig if you’re interested!

- Cut and insert the inner window wrap
The construction of the shelves rely on the insert that wraps inside of the window. The fit for this should be really snug, so be sure to measure the inside dimensions of your window multiple times before making cuts! Tip: Cut the pieces slightly long than you know you’ll need, and make blade-width cuts on one end until it fits. Attach the insert with screws to the wood studs surrounding the window. To hide the visibility of the screw heads, place screws where you know you’ll be placing one of the shelf supports assembled from step 2.

- Add outer window trim
I chose to keep the bottom sill intact, but I removed the left, right, and top trim. I then added more wood around the edge of the window as an alternative trim to match the new project and make it look more built-in. You’ll want to spend extra time at the store picking out nice, straight pieces for this so there aren’t gaps from wood bowing or twisting. To minimize surface marks, I used small brad nails.
- Insert shelf supports
With Anika’s help, I installed the two shelf supports to the corner/sides of the window wrap and then centered the middle one (it was easier to measure and make sure I’ve hit the middle this way and lined them all up). Secure each bracket with long screws to the window frame and do a “wiggle” test to make sure they are nice and tightly installed. If you experience wiggle, insert more screws, tighten them a little more, or add L-brackets.

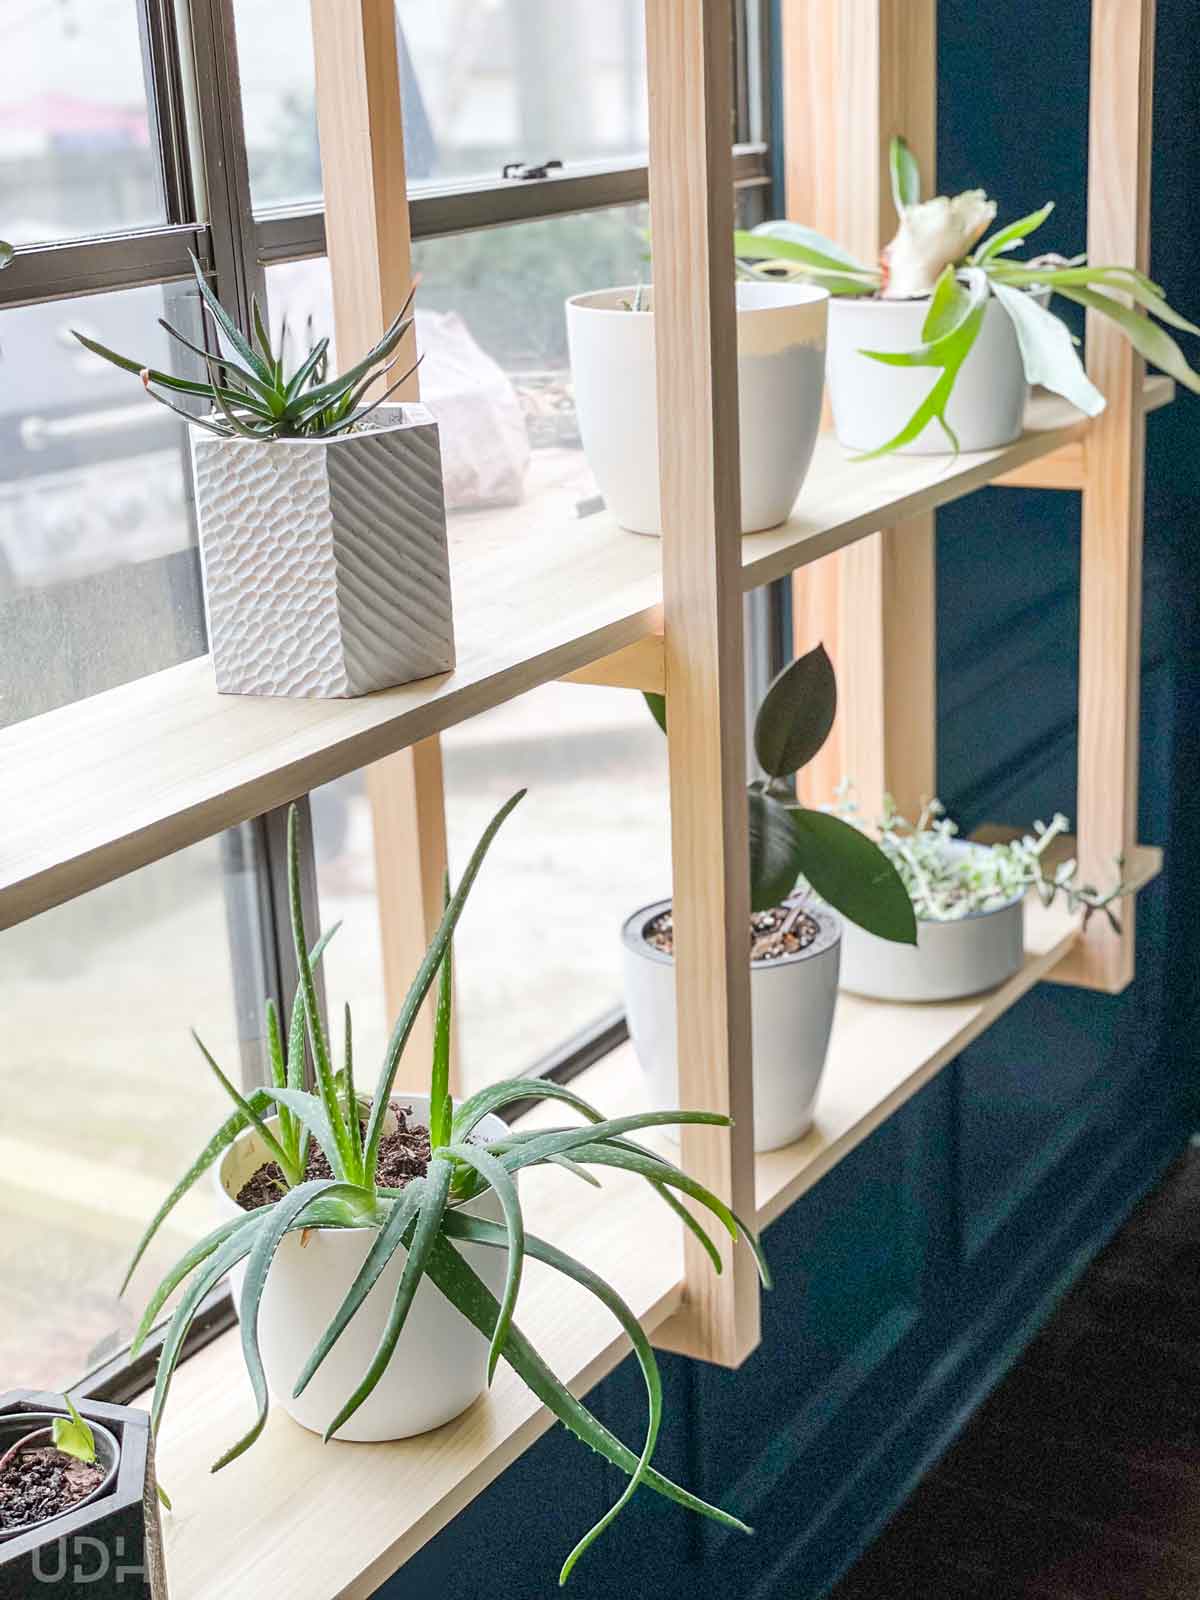
- Insert shelves and plants
This is the fun part that makes it all look complete! I cut my shelves long because I wanted them to extend past the window on both sides, but if you don’t have a lot of room on either side, you may have to cut them shorter to be able to insert them (alternatively, you can install the shelves as you install the supports in step 4, or screw the pieces together as a unit before inserting it into the window, but you’ll probably need an extra set of hands to keep everything steady until you’ve screwed it in place). I chose not to secure the shelves to the supports themselves, just in case I wanted to flip the wood as it’s exposed to the sun (sunning on one side might cause the shelves to dry out on one side and cause cupping, so I think flipping them occasionally will help them).

I am so, so proud of this project and how it turned out. They even look great from the backyard looking into the house!

Plans link is again below if you want to grab them for yourself (digital plan sales go directly to costs of maintaining this site as well as new projects, so thank you for your support!) Sadly, I didn’t get to enjoy them for very long before we decided to sell the house and move. But they looked amazing during staging and I hope the new homeowners are happy to have them.

I may have to make them again in our new house someday (YES, we found our new house!!! More details on that coming soon, along with a unique story of how we found it off-market!). Thank you guys SO MUCH for your patience in getting this project finished to share the video, plans, and blog post!
Don’t forget to pin it!

[ad_2]
Source_link
